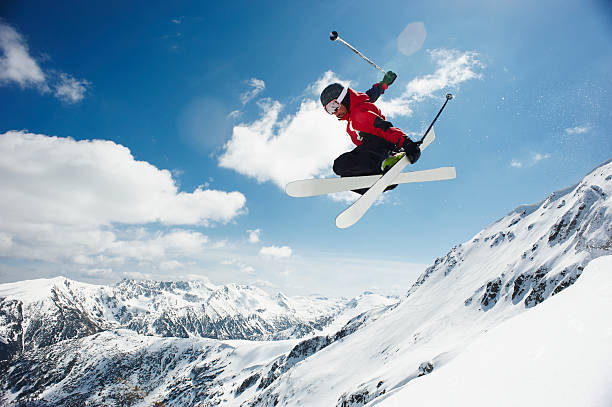
The half pipe Skate, A sculpted marvel of snow, a playground for the daring, a stage for aerial acrobatics. In the world of snowboarding, the half pipe beckons riders with the promise of adrenaline-pumping thrills and the ultimate test of skill.
Table of Contents
ToggleBut for those new to the scene, the prospect of dropping into this curved behemoth can be intimidating.
Fear not, shredders! This guide will equip you with the knowledge to navigate the halfpipe, from mastering the basics to understanding the tricks that light up the slopes.
“A half-pipe Skate is a structure utilized in various gravity extreme sports, including snowboarding, skateboarding, skiing, freestyle BMX, skating, and scooter riding.”
Anatomy of a Half Pipe Skate
Imagine a giant U-shaped trench carved into the mountainside. That’s the basic structure. The walls, called transitions, are sloped at an angle (typically 16-18 degrees) to allow riders to gain and maintain speed as they pump up and down the pipe.

The height of a half pipe skate can vary, with beginner pipes starting around 11 feet and Olympic-level monsters reaching a staggering 22 feet. Taller pipes, often called superpipes, have steeper walls that approach 90 degrees.
The frame and support structure for half-pipes used in skateboarding, BMX, and vert skating often consist of a framework made from 2×6×8″ lumber (actual 38 × 140 × 184 mm), covered with plywood and finished with masonite or Skatelite sheets.
Alternatively, a metal frame finished with wood or metal can also be used.
For commercial and contest ramps, sheets of masonite are typically attached to a frame to create the surface. Private ramps often use a similar method, though plywood might replace masonite as the surface material.
Some ramps feature a surface made by spot-welding sheet metal to the frame, eliminating the need for fasteners. Recent advancements have led to improved materials like Skatelite, RampArmor, and HARD-Nox, which, while more expensive, offer superior performance.
Customizing a ramp can be done by adding channels, extensions, and roll-ins. A roll-in is created by cutting away a section of the platform, allowing skaters to start a ride without dropping in and to perform tricks over the gap.
Extensions increase the height of a ramp section, making it more challenging. Another variation is the spine ramp, which consists of two-quarter pipes connected at the vertical edge.
Snow Half Pipe Skate
Initially, half pipe skate in the snow were manually constructed or made using heavy machinery, with pipes being cut into the snow using devices similar to grain augers.
A significant development came from Colorado farmer Doug Waugh, who invented the Pipe Dragon, which was utilized in the 1998 and 2002 Winter Olympics.

Nowadays, one of the methods for cutting half-pipes involves the Zaugg Pipe Monster, a machine with five snow-cutting edges that shapes the pipe into an elliptical form, which is considered safer and allows riders to achieve higher speeds.
Gearing Up for Glory:
Before carving your first line, ensure you have the right equipment. A snowboard with a stiffer flex (compared to a powder board) will provide more stability when carving and performing tricks.
Proper bindings with good ankle support are crucial. And of course, a helmet is non-negotiable. As for protective gear, wrist guards, knee pads, and elbow pads are highly recommended, especially for beginners.
| Aspect | Description |
| Anatomy of a Halfpipe | – U-shaped trench carved into the mountainside – Walls (transitions) sloped for speed (16-18 degrees) – Height varies (beginner: 11ft, Olympic: 22ft+) |
| Gearing Up | – Stiffer snowboard for stability – Proper bindings with ankle support – Helmet (mandatory) – Recommended: wrist guards, knee pads, elbow pads |
| Essential Techniques | – Drop-In: Lean forward, push down on toes – Pumping the Walls: Bend knees, press down on board to gain energy – Carving Turns: Engage edges for smooth arcs – Maintaining Balance: Low center of gravity, bend knees, engage core |
| Basic Aerial Tricks | – Ollie: Pop board with jump (bend/straighten legs) – Air Grab: Grab board mid-air for style/control (various styles) – Indy Grab: Backhand grabs inside edge of back foot – Melon Grab: Front hand grabs outside edge of front foot |
| Safety First | – Start Small: Begin on beginner-friendly pipes – Learn Proper Technique: Focus on fundamentals – Know Your Limits: Don’t attempt beyond your ability – Warm Up: Prepare muscles with dynamic stretches – Be Aware of Surroundings: Watch for other riders, communicate |
| Resources | – Instructional Videos: Online tutorials for techniques and tricks – Online Communities: Forums/social media for sharing experiences and inspiration |
Building the Foundation: Essential Half Pipe Skate Techniques
- The Drop-In: This is your entrance into the half pipe skate. Approach from the top with moderate speed. As you reach the lip (the edge of the pipe), lean forward slightly and push down on your toes to initiate your descent. Maintaining balance and momentum is key.
- Pumping the Walls: This is where the magic happens. As you ride down one wall, bend your knees and press down on your board. This compresses the snow, generating energy that propels you back up the other wall. The key is to find a rhythm, coordinating your body movements with the curvature of the pipe.
- Carving Turns: Masterful carving turns are essential for flowing through the halfpipe. As you ride down one wall, engage your edges to carve a smooth arc, aiming slightly higher on the opposite wall to maintain your line.
- Maintaining Balance: Balance is paramount in the halfpipe. Keep your center of gravity low, bend your knees, and engage your core muscles. Focus on keeping your weight evenly distributed on both feet.
Taking Flight: Exploring Half Pipe Skate Tricks
Once you’ve mastered the fundamentals, it’s time to take your riding to the next level. Here are a few basic aerial maneuvers to get you started:
- Ollie: This is the foundation of most air tricks. It involves popping your board off the snow with a jump initiated by bending your knees and then explosively straightening your legs while pushing down on the tail of your board.
- Air Grab: Once you can Ollie, incorporate a grab. This involves reaching down and grabbing your board mid-air for added style and control. There are numerous grab variations, each with its own unique hand placement.
- Indy Grab: A classic grab where you reach back and grab the inside edge of your back foot with your backhand.
- Melon Grab: Similar to the Indy, but you grab the outside edge of your front foot with your front hand.
Essential Tips for Half Pipe Skate Riding
The half pipe Skate can be a dangerous environment. Here are some safety tips to keep in mind:
- Start Small: Don’t attempt to conquer a monster pipe right away. Begin on smaller, beginner-friendly halfpipes and gradually progress as your skills improve.
- Learn Proper Technique: Don’t skip the basics! Mastering essential techniques like pumping and carving will provide a solid foundation for progression.
- Know Your Limits: Be honest with yourself about your abilities. Don’t get pressured into attempting tricks you’re not comfortable with.
- Warm Up Properly: Before hitting the halfpipe, perform dynamic stretches to prepare your muscles for exertion.
- Be Aware of Your Surroundings: Keep an eye out for other riders and be mindful of their lines. Communicate and share the space respectfully.
Click to read about Tyler Tucker Ice Hockey player.


